I decided to write this post since there aren’t many articles describing IntelliJ IDEA setup for Plugin Development in Jenkins. This article walks you through a GUI setup of a minimalist plugin skeleton for Jenkins Plugin Development with Maven.
Prerequisites:
- Install the latest Java SE Development Kit 8
- Install the latest IntelliJ IDEA
- Install the latest Maven release
(Optional — Since maven comes bundled with IntelliJ IDEA)
Note: Versions used in this article:
JDK— 1.8.0_181, IntelliJ IDEA — 2018.2, MVN — 3.3.9
Configure Maven Settings:
Add this following to ~/.m2/settings.xml
<settings>
  <pluginGroups>
    <pluginGroup>org.jenkins-ci.tools</pluginGroup>
  </pluginGroups>

  <profiles>
    <!-- Give access to Jenkins plugins -->
    <profile>
      <id>jenkins</id>
      <activation>
        <activeByDefault>true</activeByDefault>
      </activation>
      <repositories>
        <repository>
          <id>repo.jenkins-ci.org</id>
          <url>https://repo.jenkins-ci.org/public/</url>
        </repository>
      </repositories>
      <pluginRepositories>
        <pluginRepository>
          <id>repo.jenkins-ci.org</id>
          <url>https://repo.jenkins-ci.org/public/</url>
        </pluginRepository>
      </pluginRepositories>
    </profile>
  </profiles>
  <mirrors>
    <mirror>
      <id>repo.jenkins-ci.org</id>
      <url>https://repo.jenkins-ci.org/public/</url>
      <mirrorOf>m.g.o-public</mirrorOf>
    </mirror>
  </mirrors>
</settings>
This will let you use short names for Jenkins Maven plugins (i.e. hpi:create
instead of org.jenkins-ci.tools:maven-hpi-plugin:1.61:create), though this is
unnecessary once you are already working in a plugin project (only useful for
initial hpi:create).
Generate an empty skeleton plugin
IntelliJ setup:
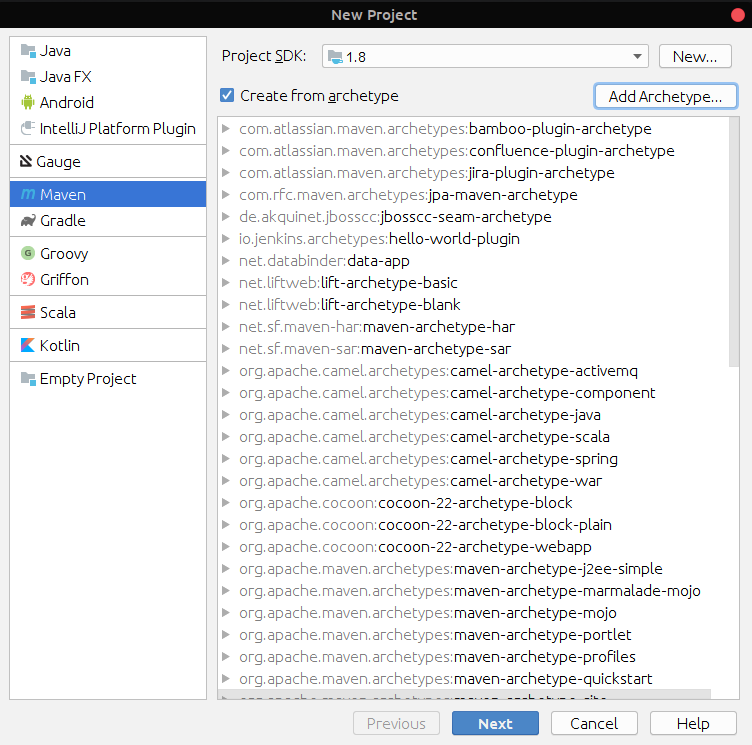
1) Select File -> New Project
2) Select Maven
3) Check Create from archetype -> Add Archetype
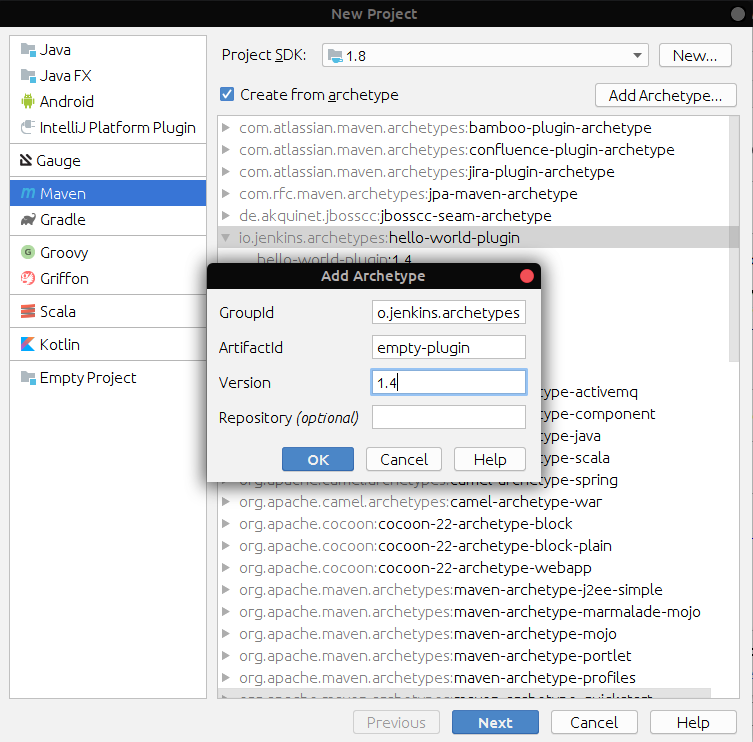
4) Enter the following:
GroupId — io.jenkins.archetypes
ArtifactId — empty-plugin
Version — 1.4
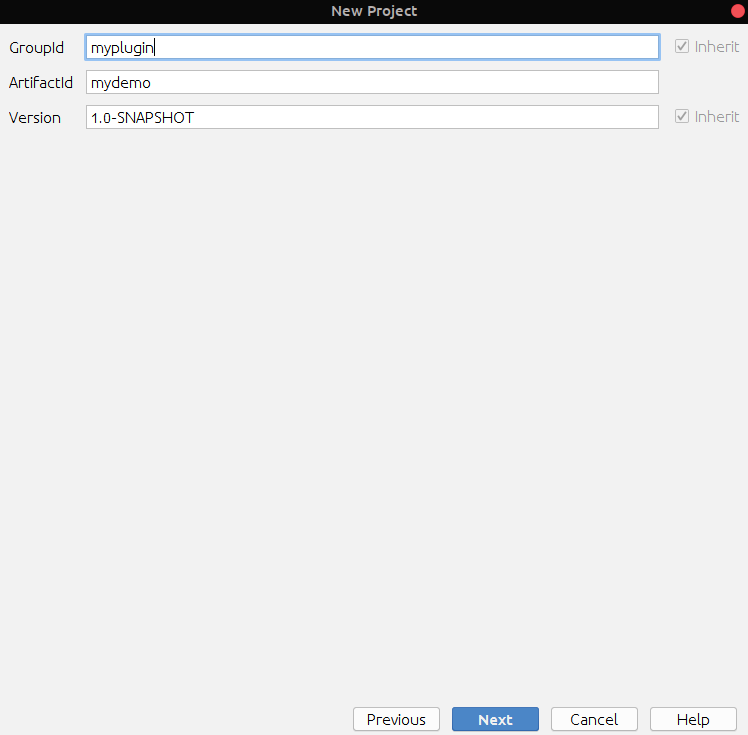
5) Enter a GroupId and ArtifactId for your plugin
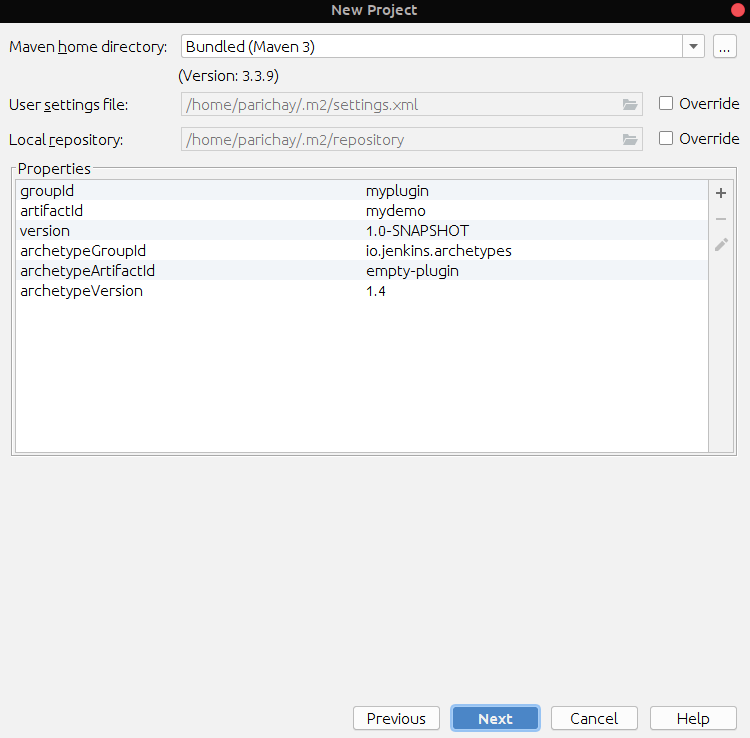
6) Select Maven 3 (either Bundled or one you installed)
7) Choose Project name and Project Location

8) Wait for maven to generate POM.xml.
Commandline setup:
To generate an empty plugin, run the following command
mvn archetype:generate -Dfilter=io.jenkins.archetypes:empty-plugin
then follow screen instructions.
To open plugin in IntelliJ:
cd <artifact-id>
idea pom.xml
Add run/debug configuration
IntelliJ Setup
1) Select Add Configuration from the Navigation Bar
2) Select + -> Maven
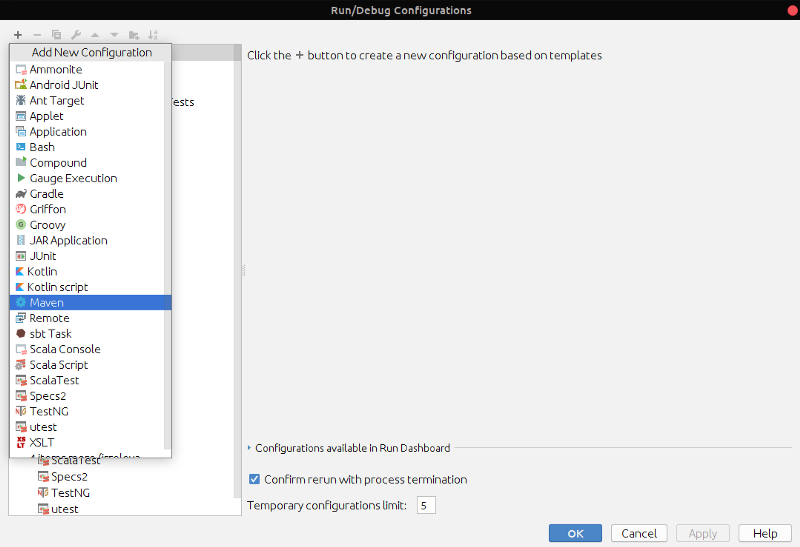
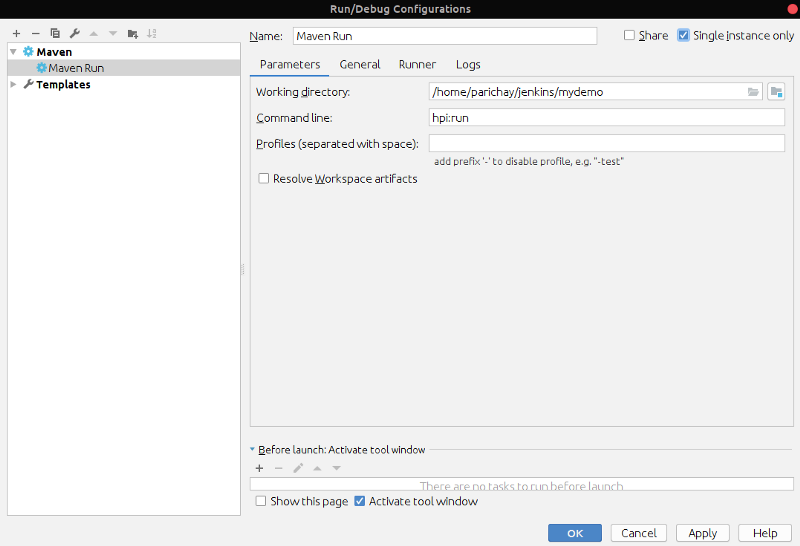
3) Enter the following configurations:
Name: Maven
Working Directory: /path/to/project
Command line: hpi:run
If you want run your jenkins plugin on a custom port use:
Command line: hpi:run -Djetty.port=8090
Select Apply and OK.
4) Select ▶ button to run the Jenkins instance (installs the dependencies upon
first run so might take a little time)
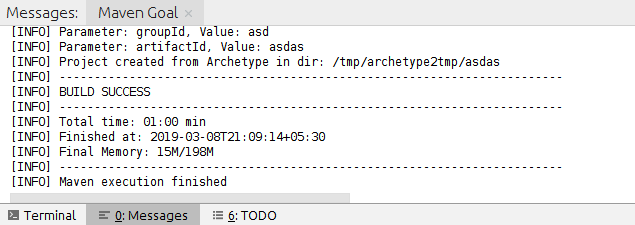
Wait until you you see
INFO: Jenkins is fully up and running
5) Log into this URL on your web browser:
localhost:8080/jenkins
You should be able to test your plugin now.
Commandline Setup
To install the plugin and its dependencies:
mvn clean install
After successful installation:
mvn hpi:run
To open plugin in IntelliJ:
cd /path/to/project
idea pom.xml
Select Open Existing Project.
Plugins to aid development:
1) Install Stapler plugin for IntelliJ IDEA
2) Install Jenkins Control Plugin
Example install:
- Select
File->Settings - Select
Plugins->Install JetBrains Plugin - Search for keyword:
Stapler - Install
Stapler plugin for IntelliJ IDEAfrom the result - Restart IDE
References:
- https://wiki.jenkins.io/display/JENKINS/Plugin+tutorial
- http://tdongsi.github.io/blog/2018/02/09/intellij-setup-for-jenkins-shared-library-development/
- https://github.com/jenkinsci/archetypes/
- https://wiki.jenkins.io/display/JENKINS/IntelliJ+IDEA+plugin+for+Stapler
- https://www.jetbrains.com/help/idea/creating-and-editing-run-debug-configurations.html